Using the Websand Transaction API
Use the Websand Transaction API to connect your customer transactions from your application or business platform into Websand.
Once connected, you’ll have a data flow. The transactional data will update against your customers. Your customers will be updated into any relevant segments. If that segment is part of an automation, they’ll be receiving the right marketing message, at the right time.
Just how you planned it.
That’s how data driven marketing works in Websand.
Processing your customer transaction data
Unlike other email marketing systems, Websand also allows you to process ‘transactional’ information.
Websand works as your marketing CRM. Allowing you to segment your audience based on not only who the audience is, but also what they’ve bought and when they bought it.
Data is a garbage in, garbage out exercise. So to get the best results from data driven marketing, you want the data you process to be in tip top condition.
API is our preferred method of collecting your data – simply put it makes things easier for everyone and keeps your head out of spreadsheets.
We have a growing list of API’s partnerships including Zapier, WordPress, Eventbrite, SendGrid, and Shopify.
However, you can’t send email marketing or put your marketing automation processes in place if you haven’t got any data, so you need to be able to import your data into Websand.
Before you put your API in place, you may want to add some test data, or you might simply want to use Websand using manual imports. Both are perfectly fine.
Websand Transaction API Documentation
Using this document
This document provides details on using the Websand API. That is feeding data from your platform or business system directly into Websand in an automated fashion.
You will need to have a Websand account set up before you start the API process.
If you are using an existing established e-commerce platform we probably already have an API in place (or planned) so please get in touch.
If you are looking to connect your own bespoke data or platform. Please proceed 🙂
Websand REST API
The Websand API is an HTTPS interface with endpoints for specific actions.
The API follows REST conventions by using HTTPS verbs equivalent to the request type – requests to delete resources use the DELETE HTTPS verb, resource creation requests use the POST verb etc.
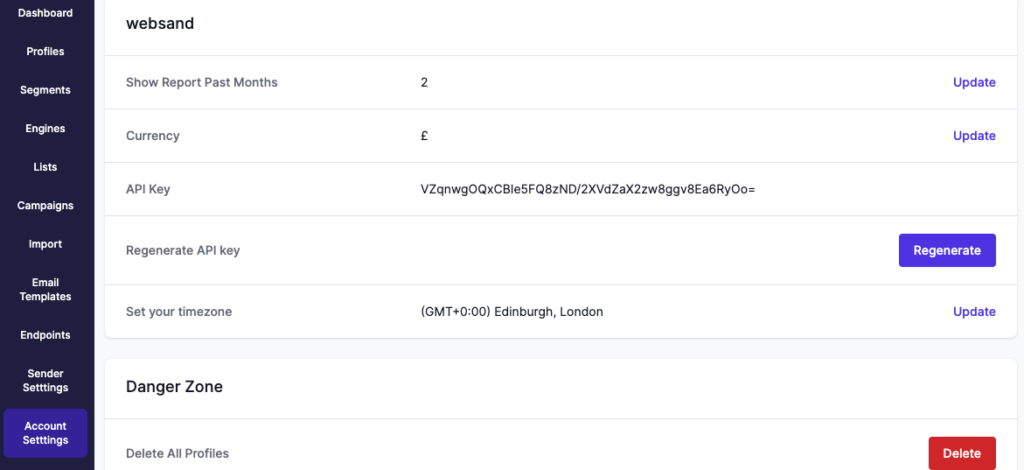
Authentication is handled via a HTTPS Token authentication header which can be generated from your Websand instance from the Account Settings Page.
"Authorization: Token {YOUR-API-KEY}"
General Data Endpoints in use by Websand API:
Websand has two API endpoints you can use.
The transactional endpoint accepts customer transactional data (both the transactional events and those people participating)
The subscriber endpoint which accepts non transactional customer data – i.e. a list of people. Click here for more details on the Subscriber API
Transaction Endpoint
The transactional endpoint accepts customer transactional data (events and the people those events relate to)
Each endpoint is unique to each account, you can find the Transaction (sometimes referred to as the ShopifyAPI endpoint) endpoint from the Endpoint menu within your Websand account.
POST https://v4wbsd.com/{{your_websand_endpoint_path}}
Example:
POST https://v4wbsd.com/ep/a5dacf21-fae1-43fb-bc14-2e68037f5870
Receives customer transactional data in JSON format for processing and indexing and requires authentication. That is a transactional event and to whom it relates.
The API supports custom additional fields which can be included in the request as required by the customer, however the below structure is the minimum data required for a useful payload.
Minimal request body is below. This is the MINIMAL REQUEST.
EXAMPLE PAYLOAD
{
  "orderId": 4675433693409,
  "items": [
    {
      "name": "The Lindt Deluxe Chocolate Cake"
    }
  ],
  "total": {
    "total": "55.99"
  },
  "customer": {
    "email": "test_endpoint_transaction@test.com",
    "source": "Shopify",
    "first_name": "Dennis",
    "subscribed_at": "2022-03-21T18:34:10+00:00",
    "accepts_marketing": true
  },
  "submit_datetime": "2022-03-31T14:36:49+00:00"  // order date //
}
If the transaction contained multiple items, the JSON payload would need to be nested and would look like this.
EXAMPLE PAYLOAD
{
  "orderId": 4675433693409,
  "items": [
    {
      "name": "Pink Happy Birthday Flashing Cake Topper"
    },
    {
      "name": "Custom Age Topper Balloons"
    },
    {
      "name": "The Lindt Deluxe Chocolate Cake"
    }
  ],
  "total": {
    "total": "55.99"
  },
  "customer": {
    "email": "test_endpoint_transaction@test.com",
    "source": "Shopify",
    "first_name": "Dennis",
    "subscribed_at": "2022-03-21T18:34:10+00:00",
    "accepts_marketing": true
  },
  "submit_datetime": "2022-03-31T14:36:49+00:00"  // order date //
}
The full field listing is featured below.
({accountId, payload}) => {

  const lineItems = payload?.items?.map( p => ({
    name: p.name,
    variant: p.variant || "",
    vendor: p.vendor || "",
  }) ) || [];

return {
    accountId,
    email: payload.customer.email,

    event: {
      event: "transaction",
      transactionId: payload.orderId,
      total: payload.total.total,
      currency: payload.currencycode,
      orderdate: new Date( payload.orderdate|| new Date() ),
      discountcode: payload.discountcode,
      utm: payload.landing_site,
      line_items: lineItems,
      customer: {
        updatedsource: payload.customer.source,
        lastupdated: new Date( payload.customer.subscribed_at || new Date() ),
        firstname: payload.customer.first_name,
        lastname: payload.customer.lastname,
        address: payload.customer.address,
        street: payload.customer.street,
        city: payload.customer.city,
        zip: payload.customer.postcode,
        country: payload.customer.country,
        company: payload.customer.company,
        jobtitle: payload.customer.jobtitle,
        sector: payload.customer.sector,
        interest: payload.customer.interest,
        tags: payload.customer.tags,
        accepts_marketing: payload.customer.accepts_marketing,
      }
  },
 }
}
For payload testing, please use the Endpoint page for the Transaction endpoint.
In this feature, you can test example payloads to make sure everything works perfectly before you move into the code.

Notes when using the Websand Transaction API
submit_datetime is the timestamp used for any date-range processing in the WebsandHQ system and is ISO 8601 format.
Any (including custom) properties in the transaction container will overwrite any transaction with the same orderid The newer data supersedes older data.
Any (including custom) properties in the customer container are merged with the persistent customer profiles upon import. The newer data supersedes older data.
Access the API key for the account from the Account Settings Page.
Response Statuses
2xx responses
2xx responses indicate successful requests. The beautiful #200’s, it’s all good.
4xx responses
4xx responses indicate issues with request data/authentication – response body should include specific error message(s) to help you go all Sherlock and figure out the issue. Something wrong at your side – get in touch and let’s see how we can help.
5xx responses
5xx responses indicate server-side issues. OMG. Something wrong at our side – please raise the alarm and let us know.
Need help with the API
If you need more help using the Websand API, or further help with your email marketing or data strategy. We’d love to help so please get in touch.
Email support@websand.co.uk or book some time on the calendar below