How to import your transaction data into Websand
This page explains the steps you need to follow to import your customer order data (in csv format) into Websand using the import function.
If you need information about how to import email subscriber information please click here.
The items covered within this page are listed below, and if you need any help please click here and book some time with us
Table of Contents
IMPORTANT NOTE: This import process is only for orders with a single line item, If your order data features line items please use this process.
Organising your customer order data before importing
As the name suggests, transactional data refers to transactions your customers have made with your business.
Any spend that is recorded will be used to generate your customer lifetime value dashboard, populate any spend-based segmentations will be used to attribute spend to your email marketing campaigns.
However, it can within Websand, you can also use ‘zero-fee’ transactions to manage the behaviour from your users such as tracking login history (from your application), scheduled meetings (from prospects using a tool like calendly), or surveys.
It’s a good idea to organise your data before you import.
One of the biggest issues marketers have with email marketing is inconsistent data. To get the best results from data-driven marketing, you want the data you process to be in tip-top condition.
Websand makes the data management side of email marketing easy, so moving to Websand also gives you the perfect opportunity to organise the way you are going to process your customer transaction data into Websand.
Creating a transaction template for your customer order data
If you are planning to import data into Websand. We find that Google Sheets is a great way to create a data template. We recommend you make a copy of this Google Sheet Template and use this as the basis for organising your data before you being your import.
Google sheets retain format far more consistently than excel and offer an easy to use csv export option.
Click here to view and make a copy of your own import template
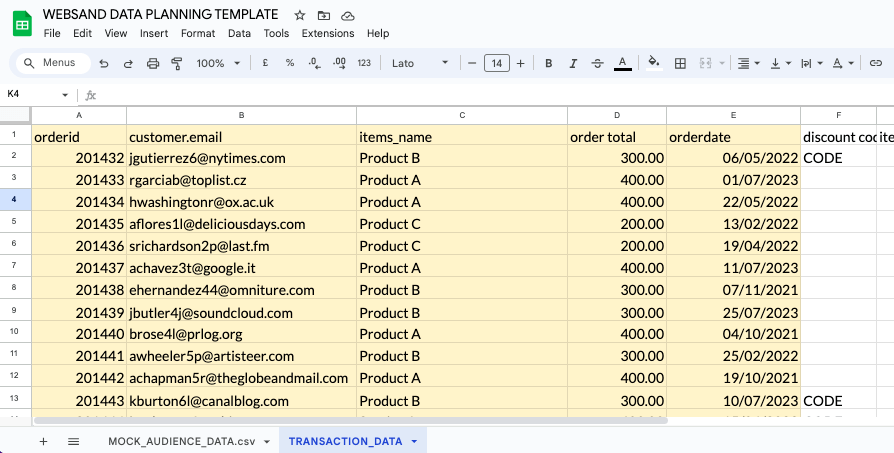
When using the template, in addition to the mandatory information try to only include the data you need.
Your mandatory fields are in yellow so need to include the data for those column (read more about the mandatory fields below).
Importing your customer order data
Unlike other email marketing systems, also allows you to import ‘transactional’ information. This is really important as the customer order data is needed to populate your Websand dashboard metrics.
The data is also used as the basis to allow you to segment your customers based on not only who the audience is, but also what they’ve bought and when they bought it.

Mandatory fields for importing transactions into Websand
When you are uploading your Transactional CSV we have five MANDATORY fields. If these fields aren’t included the import won’t be processed and you won’t be able to upload the data.
Not to worry as these fields are data that you would always find within a transaction.
The mandatory fields are as follows. Fields in [brackets] refer to Websand field name within the import mapping.
Order number or a transaction id [orderID]
This field is used as a primary key for your transaction. If you upload the transaction with new information it will update against this ID.
Transaction date – [orderdate]
The date that the transaction took place, if you have other date fields you can add them during the import, or can use the most relevant date for your activity as the date field for your setup.
Email – [customer.email]
The email address of the customer, this field connects the transaction to the subscriber.
Product or Service purchased – [item.name]
The item they have bought. CSV imports are limited to a single item for each transaction. However, multiple items against an order id can be handed through the API or integrations. If you need assistance on this please book a call or email support@websandhq.com
Order Total – [total.total]
The amount spent in that transaction. This can be a ZERO item. If so please enter 0.00 in the field. Websand uses this value to work out the customer lifetime value for each customer.
TIP: If the total includes add-on elements such as shipping or tax, you might want to use the sub-total from your order information for the transactional information you import or integrate into Websand. That way the customer lifetime value is a true reflection of the purchase value created by that customer.
Adding additional other transactional data.
In addition to the fields above, other typical fields related to a transaction are available. You may want your import to include an order status, category, sku code or whichever fields you need to drive your segmentation strategy.
We recommend you only include data you wish to use for segmenting your audience. That way you limit the data within the platform and keep things nice and simple.
If you need to add additional data, you can include those extra fields into the import process add them to your template and the transaction (based on the OrderID) will be updated accordingly.
IMPORTANT NOTE: This import process is only for orders with a single line item, If your order data is features line items please click here.
Formatting your data before import.
Trouble shooting tips for your transaction import file
Importing transaction data can be a tricky process, here is a list of the typical issues people have when they have problems with the importing process (it’s usually the data).
CSV files only please. Make sure you are uploading a CSV file. Excel files cannot be imported.
No blank columns. Before uploading your CSV, please make sure that all of the columns have a title. Otherwise this could cause issues with the upload process.
No repeat columns. Before uploading your CSV, please make sure that all of the columns have different names. Otherwise this could cause issues with the upload process.
Mandatory fields are Mandatory!. Remember to include the mandatory fields as a minimum requirement.
Date format (ISO or DD/MM/YYYY) please. Date fields can sometimes cause a problem, we need the date to be in ISO format or in DD/MM/YYYY. If you experience problems importing, set the date field in the CSV to this format, save and try the import again.
Multiple items in the transaction. If you have a ‘nested’ field structure a CSV import will have limited results. If that is your situation check out our API and integrations or get in touch and we’ll find the best way to deal with that data.
Creating a Transaction Template
Using a template helps you keep the data consistent, which is always super important.
That being said, wherever possible rather than importing transactions we always recommend you connect to Websand using an integration for your transactional needs.
If you are planning to import data into Websand. We find that Google Sheets is a great way to create a data template, it handles data requirements (especially date formats, please use DD/MM/YYYY or ISO format) much better than excel.
Click here to view and make a copy of your own import template
Importing your transactional data into Websand
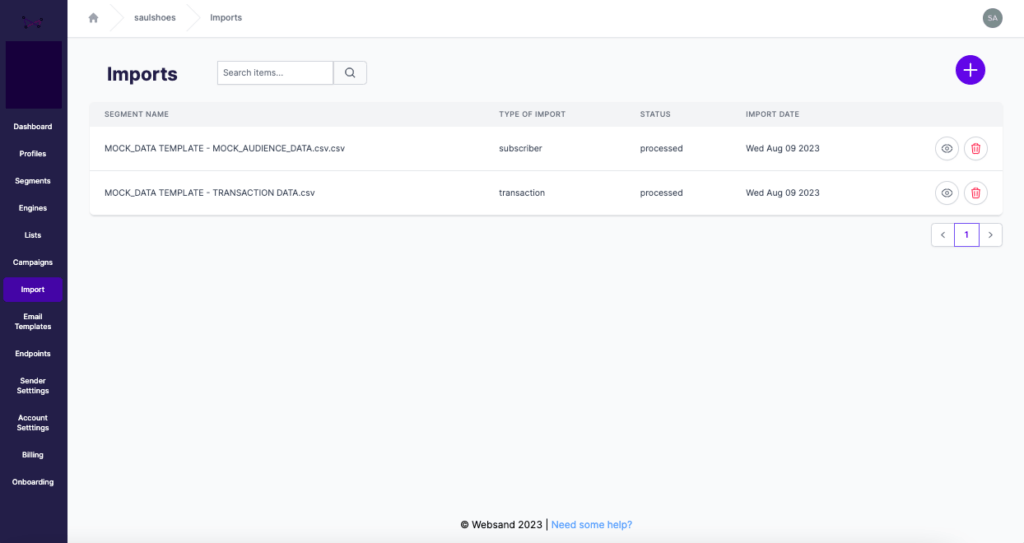
To import your CSV file into Websand, select the Import Data from the Menu
You’ll then enter the Data Import Screen, where you can add new imports and review the history of the imports you’ve made into Websand.
Step 1: Select and upload your CSV file
To upload your CSV file to Websand. Press on the [+] button in the top right corner of the screen.
If your upload is related to transaction or customer order data then please select ‘Transaction’.

If your data relates to subscriber data then please select ‘Audience’. If need to upload some suppressions (contacts that have previously unsubscribed or bounced) please select ‘Suppression’
Then select the CSV file you want to upload and select Upload Data.
Step 2: Mapping the data
Now the fun bit. Match the data from your CSV file to your Websand account set up.
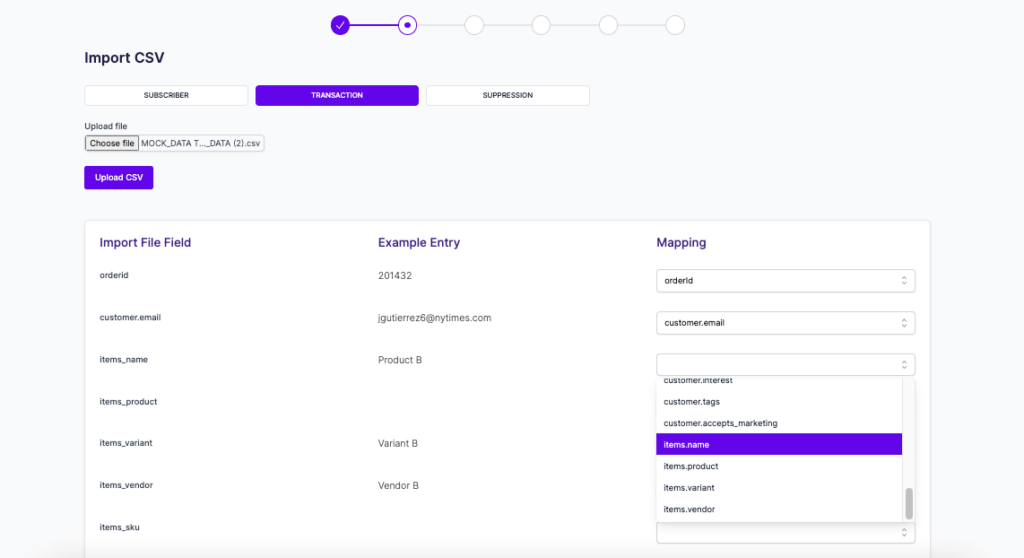
Simply select the relevant columns from the ‘import file field’ (left column) and match them to the selected field in the ‘mapping’ column (right column).
Once you’ve mapped the data you want to import. Click the “Start Import” Button
TIP: If you’ve used the import template the field names on the left will match your selected field options. Keeps things simple, and ensures data consistency 🙂
Step 3: Verify the date format
Data formats can be difficult to deal with, so this step allows you to configure the format of any date fields that are included in the import selection.
Use the dropdown to select the date fields (you can select more than one), and then select the date format that matches the data format you are using.
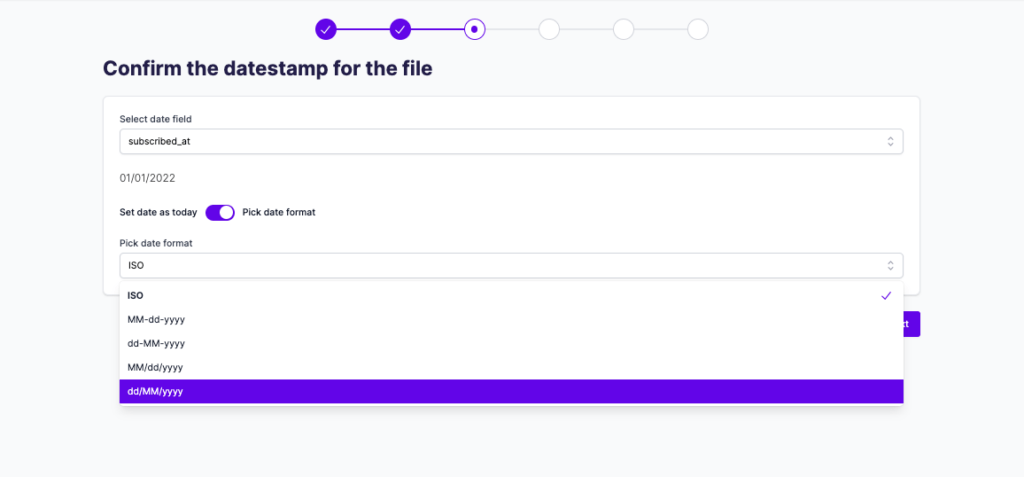
Once you’ve set your date format. Click “Next” to continue.
Step 4: The legal bit
This is important, we need you to confirm that you have the agreed consent to send email marketing to those contacts that are included in the import.
As we are a UK company, we need to include this step as part of our requirements under GDPR as a responsible data processor.
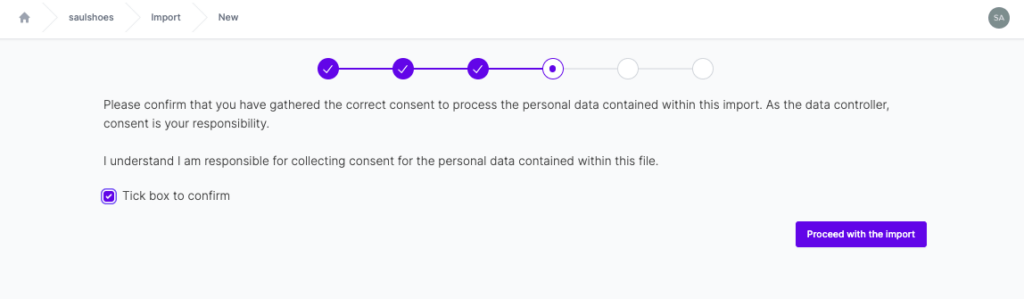
To continue with the import, tick the box and click to Proceed with the import.
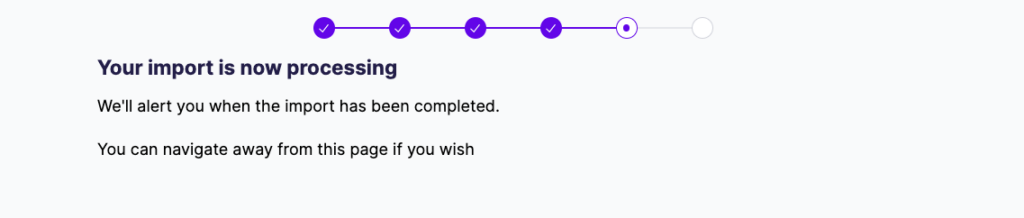
Your data is now being processed. Depending on the size of your file, this might take a little while, you can click away from this page while the import concludes.
TIP: A simple way to check on progress is to return to the home screen, the numbers will refresh from time to time as the data updates or check on a profile from the profile list page.
Step 5: Import complete
The details of your import will appear once the import has been completed.
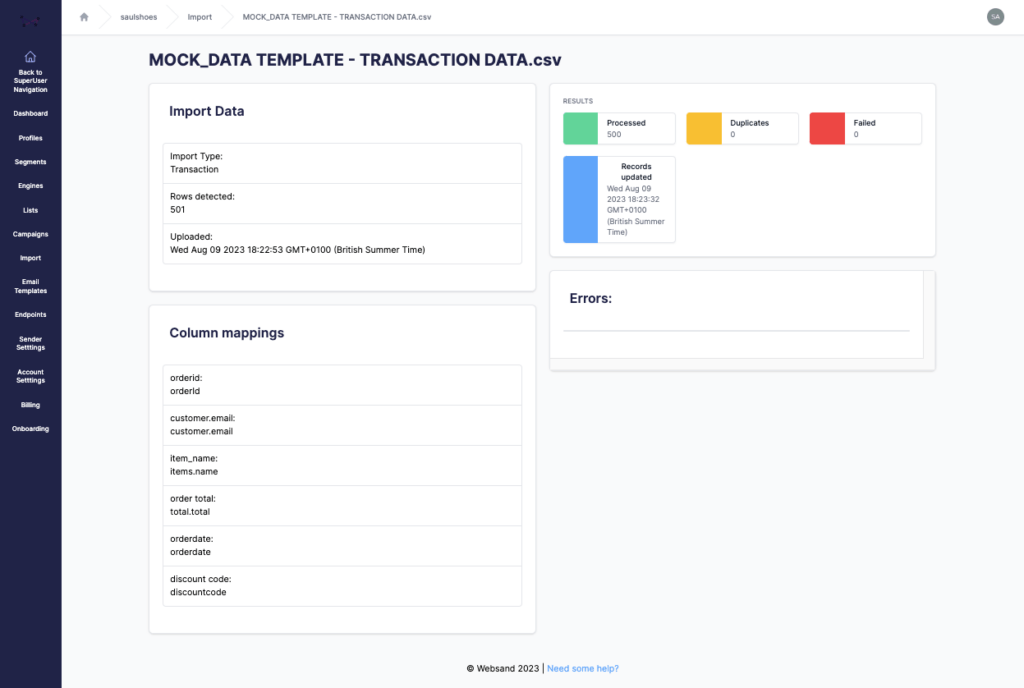
Step 6. Validating the import
Your data will now be in place, you can check the import has worked correctly using several different methods.
Head over the to Profile option from the menu, search and then and click on an example record from the import to make sure that the data is in place.
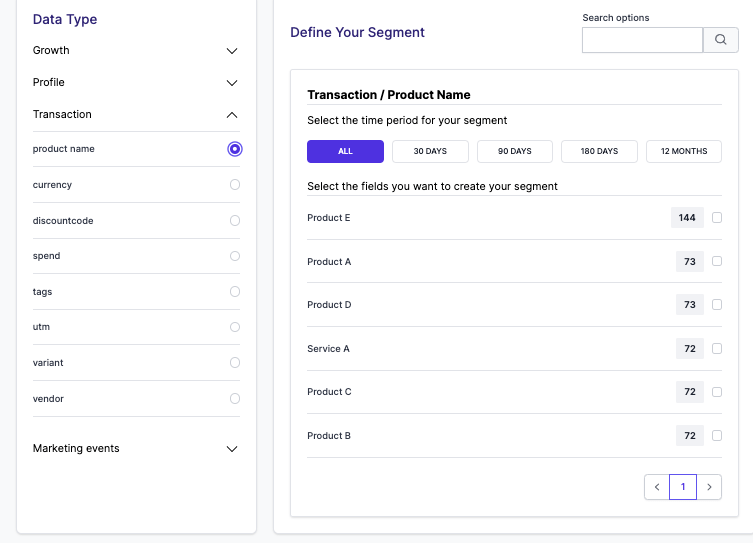
Or if the data features a new data point, go to the segment menu and the data for a specific field (in the example below – product name). If the import features a specific product, check the data by reviewing the feature list (centre column) when you select the ‘product name’ field option under the ‘Transaction’ option, and then search for the product using the ‘search options’ box.
Try some direct integrations to Websand
Importing is a useful process, especially for offline data collection, but it’s time sapping. Wherever possible, we strongly recommend that you explore our integrations. It’s easier than you think to connect Websand to the processes and systems you already have in place within your business.
Not only will that save you loads of time, your data will be consistent and automatically updated, making sure you get the best results from your email and marketing automation activity.
Here are some easy ways to connect your customer order information to Websand
Connect directly to our Transaction REST API.
Connecting your business systems through one of the 1000’s of Websand integrations with Zapier
Need help with your importing?
If you need more help using the Websand csv import, or further help with your email marketing or data strategy. We can help so please get in touch.
Email support@websand.co.uk, or schedule a call / meeting