Creating a customer retention segment
Websand is built for data driven marketing, so segmentation is a key feature within the platform.
This section explains how to create a customer retention segment. Allowing you to create groups based on when customers last purchased from you.
These segments are the foundation of any customer retention programme and can be used to unlock huge amounts of previously untapped revenue.
Return to the Segmentation Page
Creating a customer retention strategy through segmentation
Retention segmentation will help you to identify those people that haven’t bought from you for a while.
These segments are really important to help you understand which customers are heading for the exit door. Allowing you to understand a little bit more about your customer behaviour.
It’s also great foundation to create your own retention programme and keep those customers coming back for more.
Creating your retention segment
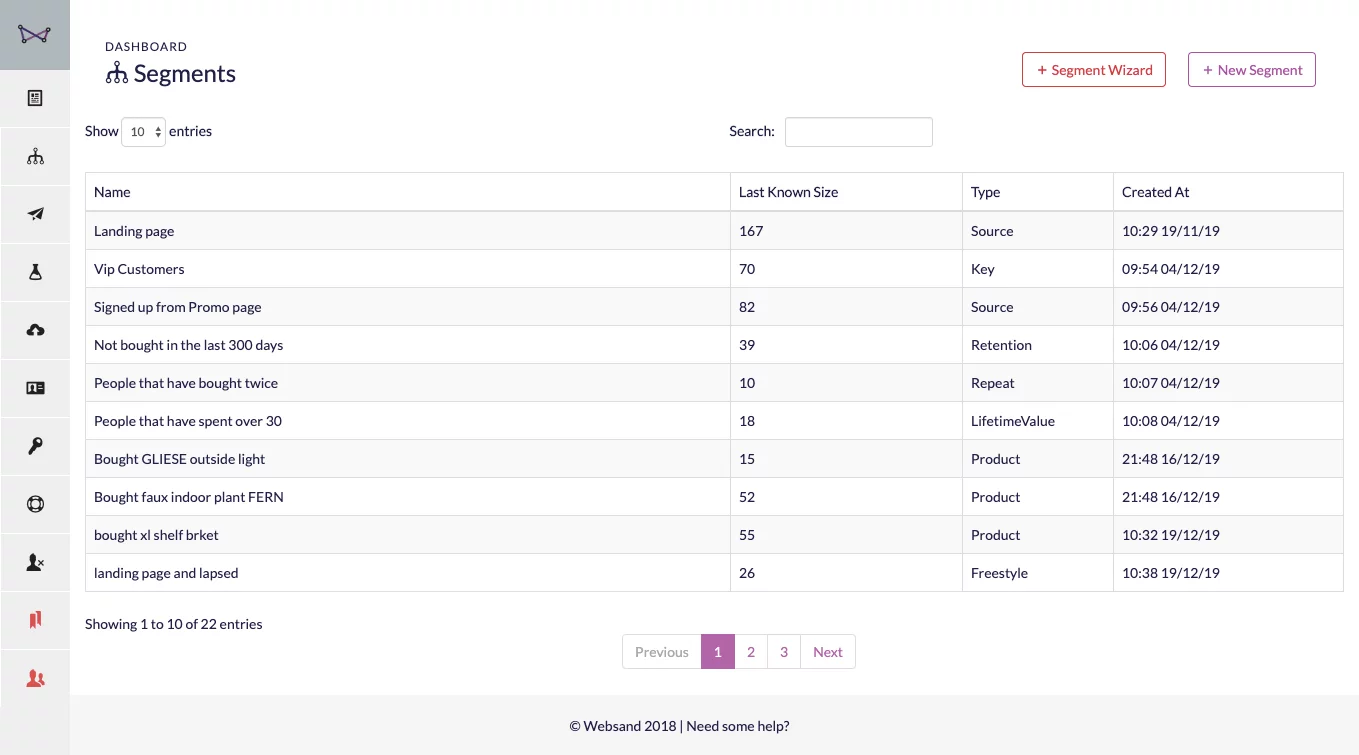
Step 1: Select the retention segment
Select Segment from the Websand Menu and then hit the [+ new segment] button in the top right corner of the screen.
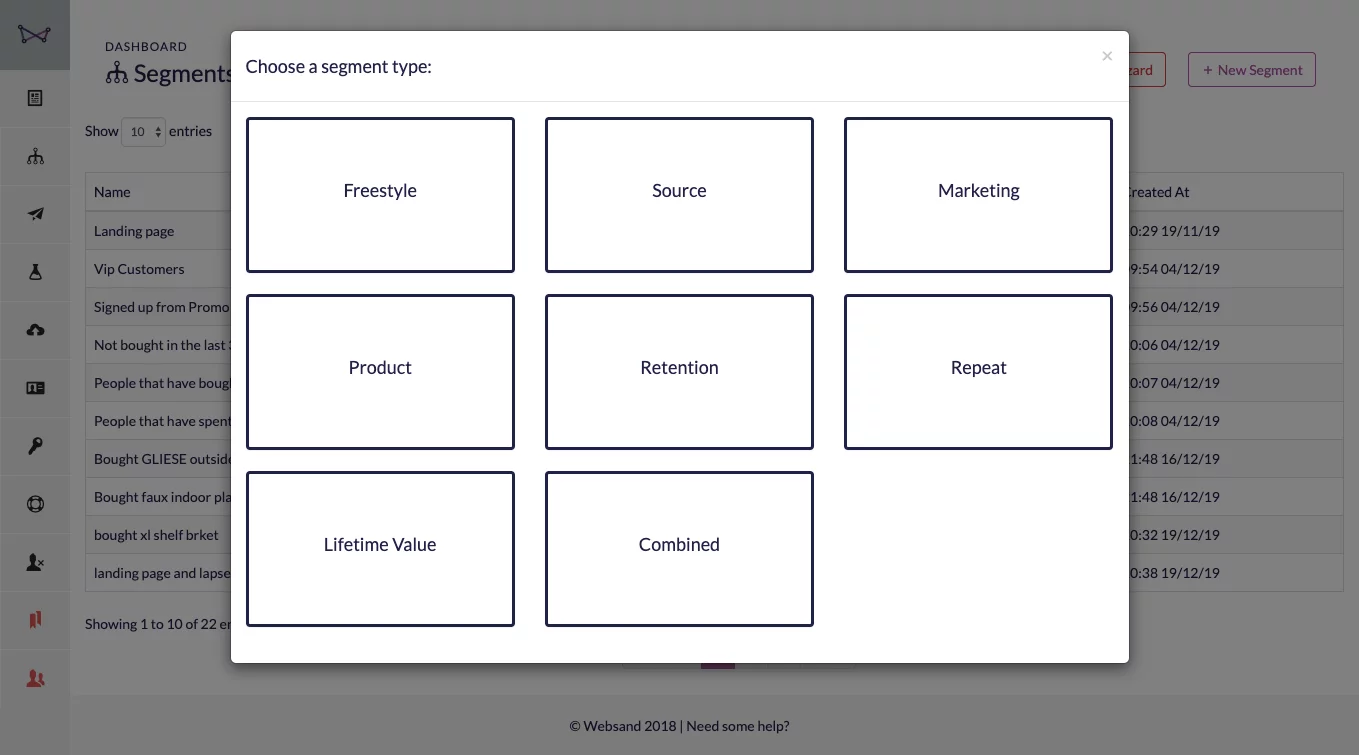
Select retention from segmentation options and that will bring you into the retention segment screen.
Step 2. Select ‘without purchases’
For retention segmentation – choose the ‘without purchases option’ to select those people who have not purchased.
Alternatively, select ‘with purchases’ to create segments for those people who ‘have purchased’.
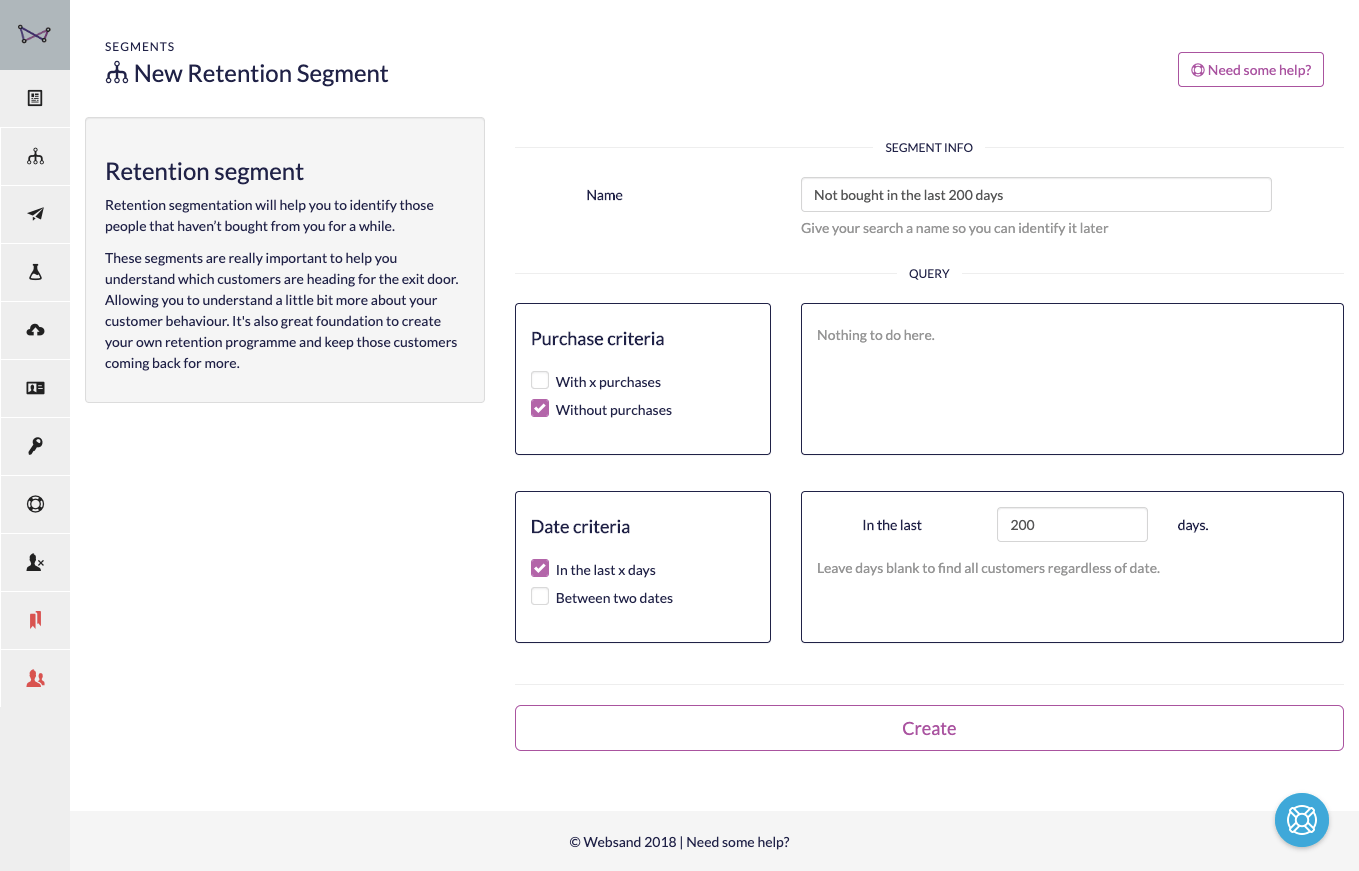
Step 3. Choose the time period for the segment
You can then filter the segment, to set the time period since the last purchase for this segment.
Select from
in the last [number] of days
or a specific date range – between [start date] and [end date].
Step 4. Name and create your customer retention segment.
Use a name you and your peers can easily understand for your segment, for example – “Not bought in last 90 days”
Click the ‘create’ button to create your segment.
Well done. You’ve just created a new segment to help you understand which customers haven’t bought from you for a while. From that day forth (until you decide otherwise), your customers will be segmented accordingly.
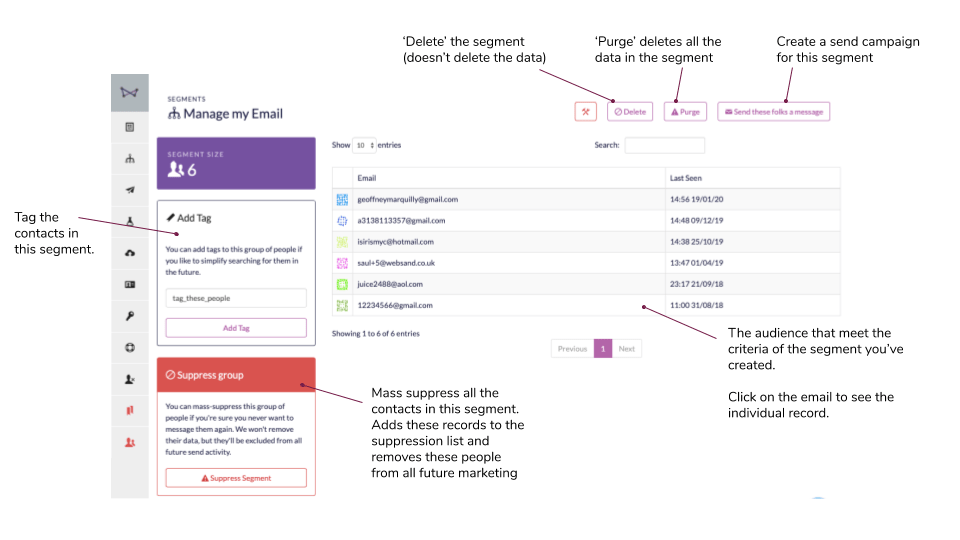
Step 5: Review the results
See the list of people that meet the criteria of your segment. This will update dynamically based on the behaviour of your customers. Depending on the criteria of the segment you’ve created, as new data is collected, new people will join the segment and others could leave the segment. Ideally by purchasing from you again.
What’s next? Here are some options.
Use your customer retention segments to power a targeted marketing automation campaigns. Customer retention segments are the foundation for any loyalty or retention programme. For more see this blog post about using Websand to create a customer retention programme.
Monitor this segment as a measure of business intelligence (keep an eye on the growth or shrinkage).
Combine this segment with another segment and create a ‘super-powered segment’.
Or, you use this segment to send a one off marketing message to drive more customer engagement.
Return to the Segmentation Menu


Need help to get started with segmentation?
If you need more help creating customer segmentation or simply want to know more about how we can help you create data-driven email programmes that perform off the scale, get in touch.
Email support@websand.co.uk or book some time on our calendar.