Getting your new signup data from WordPress to Websand
Announcing the Websand Subscriber Form for WordPress. If you are using WordPress, we’ve built a lovely little plugin to allow you to capture ‘audience’ subscribers into your Websand in a GDPR compliant manner.
Use the plugin to add Websand Subscriber forms to any post, page, or sidebar within your WordPress website.
You can download the wordpress plugin from your admin panel or via the WordPress plugin directory.
Note the Websand wordpress subscription form plugin works on WordPress before v5.0 also future versions. This page is this WordPress version is 7.0
Configuring the Websand subscription form in WordPress
Once you’ve downloaded the Websand subscription form activate the plugin from the Plugin directory

You can then configure the settings from the Settings menu. Settings >> Websand Subscription Form.
Websand subscription form – Main Settings
You will need to complete the following Main settings. These are standard across all the Websand subscription forms you create.
Once you’ve downloaded and activated the Websand WordPress Subscriber Plug-in you can access the settings from the Settings menu in your WordPress access panel.
Websand Account Domain
This is account name of your Websand domain. So if your Websand domain is superecommercestore.websandhq.com enter superecommercestore into the box
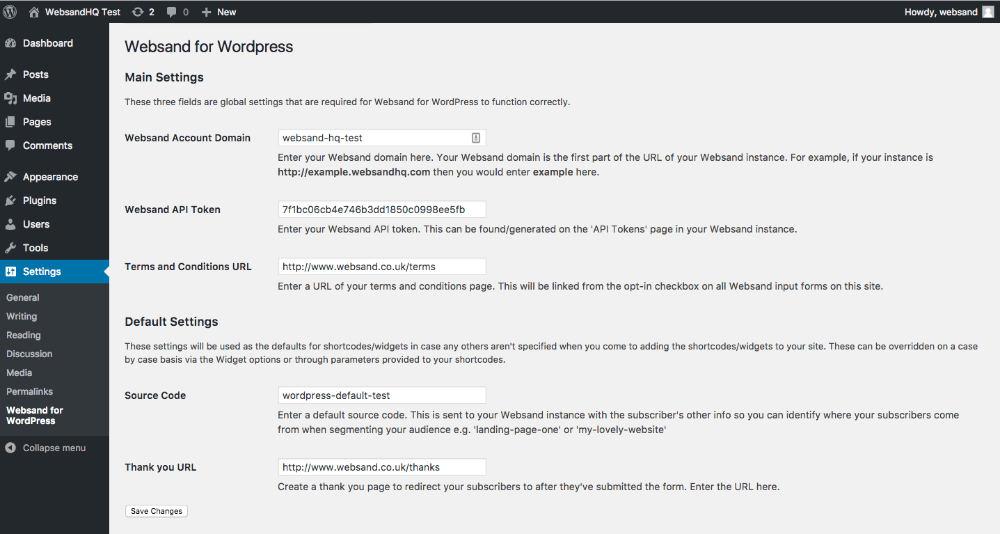
Websand API Token
Enter your Websand API Token. This can be found or generated from the ‘API Tokens’ page within the integrations section in your Websand instance.
Terms and Conditions URL
As part of the sign up, your subscribers need to agree to your terms and conditions and/or privacy policy. This is key to covering your GDPR obligations.
Enter the URL of your terms and conditions page. This will be linked to all the opt-in checkbox on all Websand subscriber forms on your site.
Websand subscription form – Default Settings
These are settings that you can change for each Websand subscriber form you create within WordPress. The settings here are your ‘default’ position.
Source Code
Enter a default source code for your signups. This will assign a source code value to each person that signs up through your subscriber form.
Initially it’s a really useful way of understanding the volume of people that signup from different places.
You can configure a new source code for every Websand Subscriber Form you create. That’s dynamite information. It will help you to understand who has signed up from each position. Create an automation linked to a source segment to send a relevant welcome message to your subscriber based on where they signed up.
But source code information is really powerful in the longer term.
It’s a great way to understand the total financial value of customers that sign up from certain places. Once you understand it’s much easier to decide where you are going to spend the acquisition part of your marketing budget. Trust me on that one.
Thank you URL
Welcome your new subscribers by redirecting them to a lovely thank you page when they sign up. Enter the URL for your thank you page here.
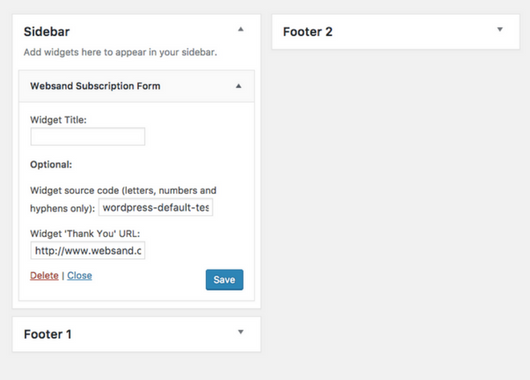
Using the Websand Subscriber Form WordPress Plugin as a Widget
Select the widget menu from Appearance >> Widgets. Look for the Websand Subscription Form
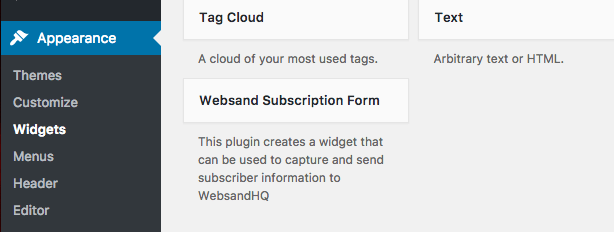
Pull your Websand Subscription Form into position, you can amend the Source Code and Thank You URL for each of the Websand Subscription Forms you create.
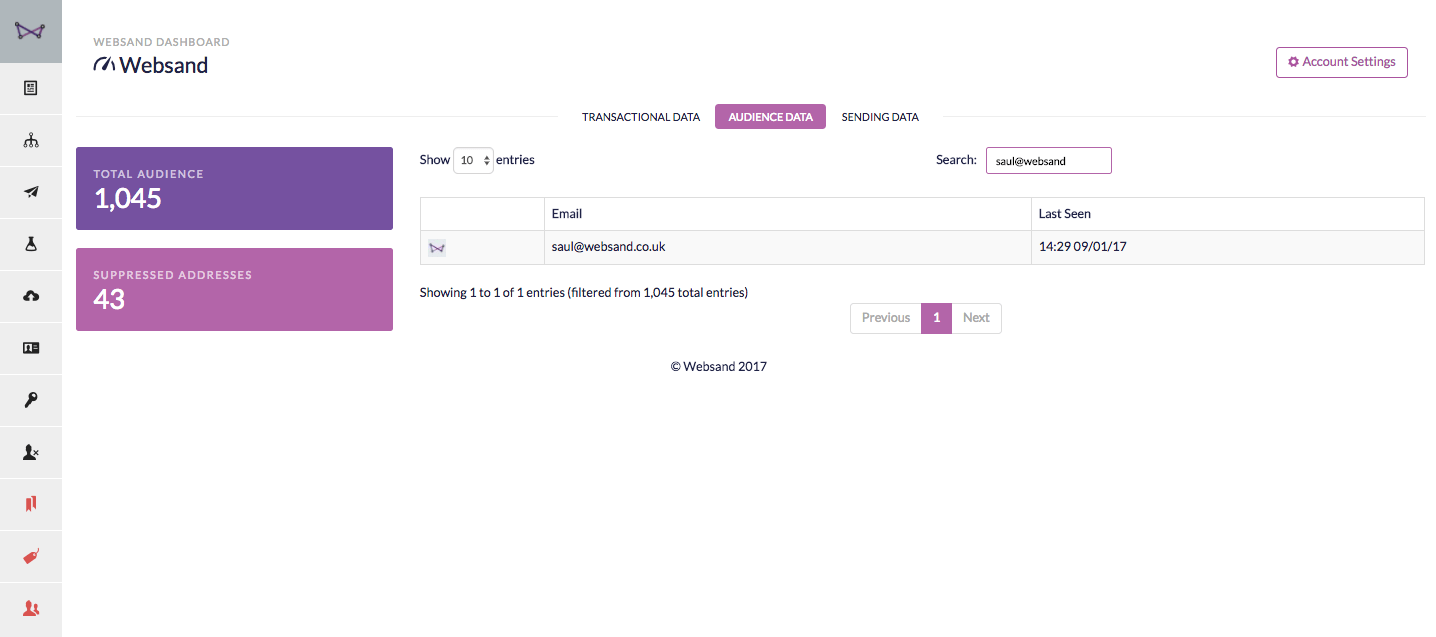
Where does my subscriber data go?
Any data that is collected from your Websand Subscriber Form WordPress Plugin will automatically be updated to the Audience within your Websand account.
Don’t worry if the person already, you won’t create a duplicate, but you will update their data.
Now the clever bit.
Put a little bit of source segmentation in place and then attach that to some automation.
As soon as their information arrives, your Websand account will send them your specially prepared and personalised Welcome Message.
Boom! That’s another happy prospect closer to being converted to a new customer. Your email marketing is alive and well
Your WordPress Plugin Options
Inserting the form into your WordPress page
You can add a Websand subscriber form within a Page or a Post. You can either use the plugin as a widget and place it into your page structure. Or you can use the shortcode websand (in [ ]) to place a form into a page or post like this.
\\ Creates a subscriber signup form using your Websand subscription form default options as defined in from the WordPress Settings menu.`
No need to worry about your CSS. As you can see, the form will automatically pick up the styling within your template.
Once entered the shortcode will create a simple signup form for you (see below)
Configure your Websand Subscription form for individual WordPress Pages.
Depending on the complexity of your WordPress site you may wish to create some bespoke uses of the Websand subscription form on specific webpages or posts.
Using bespoke shortcodes allows you to identify the page that the subscriber signed up, or direct your audience to a relevant webpage. Giving a great start to any prospecting programme as you can be targeted in your Welcome communication from the beginning.
Define the source of signup
Simply add a small piece of code and the label you wish to apply as the “source” for the subscribers using this form.
\\ Creates a subscriber signup form which will both tag your subscribers with my-lovely-source-code
Redirect the subscriber to a specific webpage
If you want to direct the user to a page that’s different to your standard signup redirect page, you can also add a small piece of code to the subscriber form shortcode.
In the example below the subscriber would be directed to https://www.example.com/thanks. html after signing up.
\\ Creates a signup form which will open a page that directs to https://www.example.com/thanks. html after subscribing
Combine specific source and redirect the subscriber
If you want to label and redirect the subscriber in a different way to the normal Websand subscriber form settings you can combine both bits of shortcode.
\\ A signup form which will both tag your subscribers with my-lovely-source-code and open a page that directs to https://www.example.com/thanks.html after subscribing.
In the example above, the subscriber form which will both assign your subscribers with my-lovely-source-code and open a page that directs to https://www.example.com/thanks.html after subscribing.
These enrolment requirements might seem a little steep, however these changes give you a history of ‘explicit opt-in’ which is really important to confirm consent under GDPR. You can read more about the changes to data protection here.
A working example of the websand wordpress subscription widget
As a working example, please see the shortcode used for each signup form on this page is featured below.
Signups from this page will be assigned a source code of ‘wordpress website demo-request’ and each signup will then be redirected to a thank you page which has the address > websand.co.uk/thank-you
[websand source_code="wordpress website demo-request" thank_you="https://www.websand.co.uk/thank-you"]It’s simple to follow and easily allows you to collect and manage the marketing you want to send to subscribers based on where they signed up.
It’s time to start getting more from your email marketing
Sign up for a free Websand demo and let’s show you how to get the best from your email marketing.